7 Easter Crafts to make with your little Lambs!
Hello! With Easter soon dawning on us, I've put together a few crafty ideas you can make with your little ones to develop their fine motor skills, their creativity and to just have plain old fun! I've tried to think of crafts which don't require much fancy bits. They'll be things that you'll probably have lying around the house anyway.
You don't need to use the exact same products so don't worry if say, you don't have googly eyes. You can just replace with two white circles and black dots marked with a pen. This is just a guidance. Have fun and adapt as you want! Improvise! :) I've been helpful and highlighted the materials in green.
1. Paper Plate Sheep (www.redtedart.com)
1. Fold
a paper plate in
half.
2. Draw
two rectangles and a circle out of black card.
3. Stick
the rectangles to the bottom to make the legs.
4. Stick
the circle to the side to make the face.
5. Stick
googly eyes onto the
face.
6. Cover
the paper plate with glue stick.
7. Stick
cotton wool to make
the sheep’s coat.
8. Stick
cotton wool to make a
fluffy tail.
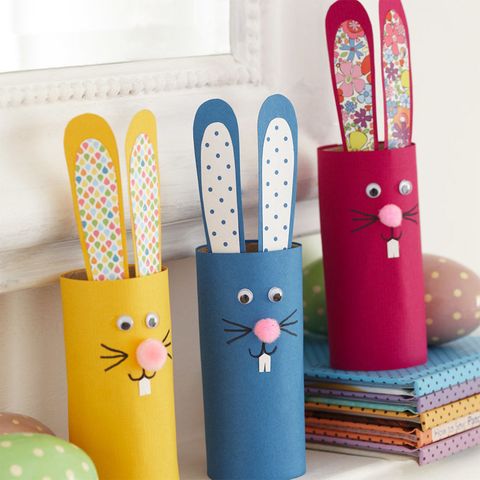
2. Rolled up Rabbit (www.prima.co.uk)
1. Cut some white card in half lengthways, then widthways.
2. Roll it up and stick with sticky tape.
3. Draw two sausage shapes on white card and cut out.
4. Repeat with pink card, but draw smaller sausages.
5. Stick the pink cut-outs onto the white
cut-outs to make ears and stick in place.
7. Stick googly eyes onto the face.
8. Get a rectangular sticky label and make a slight slit
to make goofy teeth. Stick.
9. Draw on whiskers and nose markings.
11.Stick cotton wool to make a fluffy tail.
3. Wax-resist
Easter Egg. (www.pinterest.com)
1.Cut out an Easter egg shape on white card.
2. Use the fat end of a candle to draw patterns like
zig-zags, wavy lines and spots.
3. Paint over with watercolour paints to
reveal the beautiful egg!
4. Milk Carton Easter
basket. (www.wermemorykeepers.wordpress.com)
1.Get a children’s milk carton and cut the flaps so you
have a cube/cuboid.
2. Alternatively, you can trim the flaps
and stick them down with sticky
tape.
3. Cover all four sides with glue stick.
4. Layer on some pastel- coloured tissue paper.
5. Draw Easter shapes on plain/glittery foam.
6. Cut these out, and stick onto the
sides.
7. Cut out a strip of coloured card and staple to
two sides to make a handle.
8. Finish off with tying a ribbon around the basket.
9. Fill the Easter basket with tissue paper shred and some
treats!
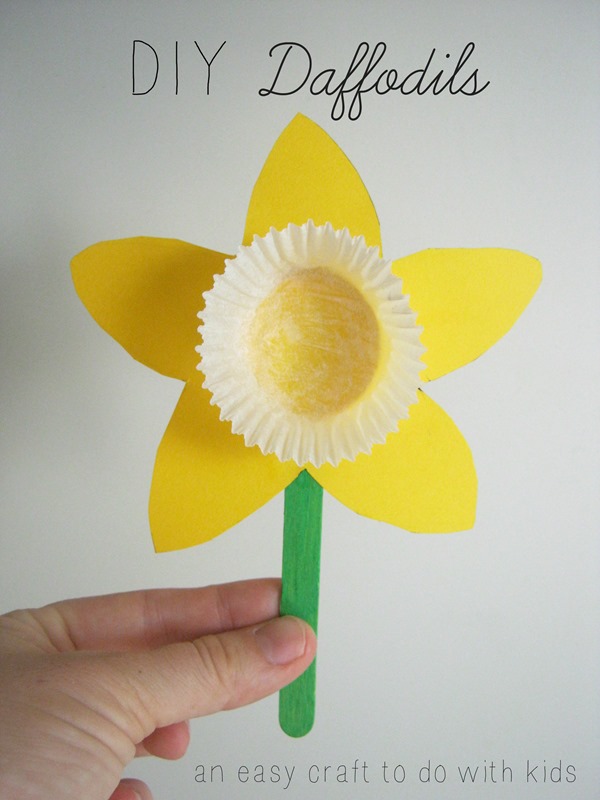
5. Cupcake
flower. (funcraftskids.com)
1. Stick a paper cake case to a lollipop stick.
2. Draw and cut out petal shapes from coloured paper.
3. Stick all the way around the cake
case, at the back, to make your flower.
4. You can draw and cut out a leaf from green paper.
5. Stick to the lollipop stick ‘stem.’
6. Spring
chicken! (www.canadianliving.com)
1. Draw and cut out a chick shape from yellow or orange card.
2.Make a face using googly eyes, paper and crayons.
3.Stick on feathers
either side of the chick to make ‘wings.’
4.Get two strips of yellow or orange
card and keep flipping both over to make an accordion shape.
5.Repeat for the second leg.
6.Attach both springy legs to the back
of the chick with sticky tape to make your
chicken a bouncy spring chicken!
The above image is for guidance. You can choose if you make a concertina pair of legs, or if you make the legs so they look like an accordion. You can use both of these techniques as a differentiation point according to the abilities of the children.
7. Easter
Egg Sun Catcher. (www.kidscraftroom.com)
1. Draw and cut out an egg shape from white card.
2. Cover with glue
stick.
3. Rip strips of different coloured tissue paper and coloured cellophane.
4. Layer onto the sun-catcher, alternating between tissue and cellophane for the best effect.
5.Use a hole-puncher
to make a single hole at the top of the egg.
6.Attach a piece of string and tie a knot.
7. Hang and watch the beautiful colours
sparkle in the sunlight! :)
Whether you celebrate Easter or not, I hope you spend a lot of quality time making these quick crafts! If you don't want to speak about Easter from a religious perspective, there's always scope to speak to children about Spring, growth, life cycles, animals and their young, more daylight and comparisons to Winter. Have an EGGcellent Spring :P
Shai xxx
*Though I was inspired by these crafts, I changed and adapted the designs to make them my own.


Comments
Post a Comment